The align normals plugin gives a high level of control to modify shading normals in blender.
It sets all adjacent custom normals of the selected faces to either the face or the geometric normals (details below).
You might be interested in the Weighted Normals Plugin which does a similar thing on object level.
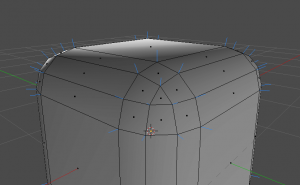 Blender's Vertex Normals |
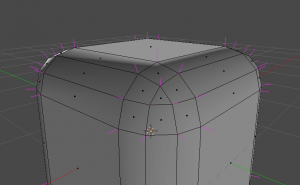 Aligned Normals (perfectly flat) |
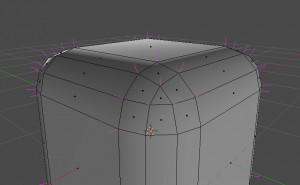 Weighted Normals Plugin |
Download: align_normals_1_1.zip
Installation:
- Go to Blender -> User Preferences -> Add-ons -> Install from file...
- Select the downloaded file
- Enable the checkbox in front of the plugin
- Save the preferences
How to use
Go to edit mode and select the faces you want to be flat while still having smooth edges.
Then press Space and enter "Align to Geometric Normals" or "Align to Face Normals".
This will enable smooth shading and custom normals (if not already set) and aligns all custom normals of the vertices to the chosen normal.
If neighbored faces are selected the last evaluated one will win the race and set the normal.
This might get improved in future versions. For now I recommend to not to select neighbored faces, or only those which are planar.
What is the difference between Face and Geometric normals?
The face normal is the average face normal as provided by Blender.
The geometric normal is computed from the two adjacent edges of each vertex on the selected face.
This gives the same normal for any planar polygon as the face normal.
The difference is that Quads and higher order polygons which are non-planar will have different normals at each vertex.
Those normals are the normals of an interpolated patch on the polygon, i.e. the smooth surface between the given vertices and not the triangulated one.
Dependent on the renderer this might be exactly what you need.
If you don't know what to use take the Face normals. In most cases the results are the same and it is unlikely that your target product features smooth patches.
How it works
Blender computes its vertex normals from the average of all faces around the vertex. Thereby, a face normal is the average normal of the face.
There is no chance to change the vertex normals!
Additionally, Blender allows to set a custom normal per-face-and-vertex to control smooth shading.
This plugin replaces the custom normals of all faces around a vertex with the face/geometric normal. Essentially, it looses some of the flexibility of per-face-and-vertex to simulate a custom vertex normal.